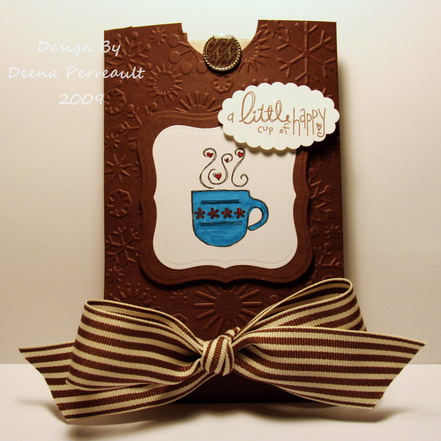
Hi everyone! From the results of the poll I took on the hot cocoa holder I posted last week, there are some of you who wanted a “how to”. So today I went ahead and made a tutorial for you. Thank you for your response to the poll, it really helps me know what my readers want to see!

Materials
Cardstock- chocolate chip 8 1/2″ x 6 3/4″, white
Circle punch
Double sided adhesive tape
Ribbon or brad
Scoring tool
Stamp- I used UNITY Hodgepodge of Happiness cup and sentiment
OPTIONAL:
Cuttlebug and embossing folder – I used Snowflakes
Die Cut Nestabilities: Labels One
Scallop oval punch
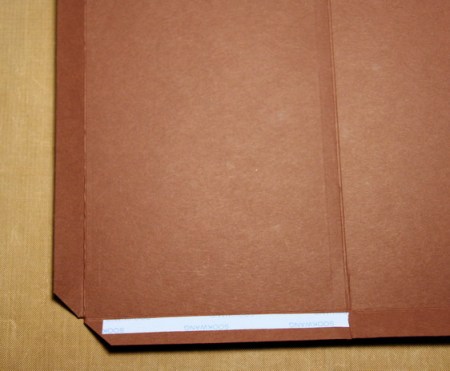
Step 1:  Score the cardstock at 1/2″ and 4 1/2″ vertically. Score the bottom edge at 1/2″.
Step 2:  Cut the corner just below where the score lines cross.
Step 3:  Add adhesive tape to the bottom folding edge just to the score line.
Step 4:  Flip the cardstock over and still working on the cut corner side add adhesive tape to the long edge and across the bottom but only to the score line.
Step 5:  Fold up the bottom edge and adhere removing the protective cover of the adhesive tape. Now remove the other strip of protective cover from the bottom right and fold over adhering to the bottom left. Now the left 1/2 inch edge needs to fold in and adhere to the inside of the front flap.
Step 6:  At the top of your pocket punch a half circle from the center through both the front and back.
Step 7:  I wanted to add some embossing to this packet and only thought of it after I had assembled the pocket. I wasn’t sure if the embossing would work through the double layer of cardstock, but it did. It was a little tight running through the cuttlebug, but I only had to give a little added push to the handle to run it through. I think this will depend on how thick the card stock is, so if you try it this way, be careful and don’t force the handle if it is really resisting. Now the back of the pocket looks pretty too, without any embellishing.
I stamped the cup from Unity in memento tuxedo black and colored it with sharpie markers. The sentiment is stamped in Memento rich cocoa ink and punched with a scallop oval punch. The image is framed using the Nestabilities labels 1 die cuts.
I also added a brad to the cocoa packet and “hung” it on the front opening. For the previous cocoa holder I used a ribbon tied through the top of the hot cocoa packet, and the knot “sat” on the edge of the opening as you can see HERE.
Thanks for stopping by, and as always, if you have any questions or comments I’m happy to read them!

Great tutorial, must get a cuttlebug, love the ribbon, take careX:)
LikeLike
this is fantastic hun, definitely going to try this!
there is an award for you on my blog too!
hugs mandyxx
LikeLike
thank you, Deena, I love it!
have a nice weekend!
hugs, Alina
LikeLike