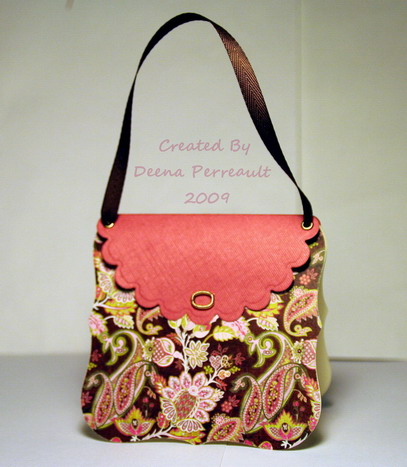
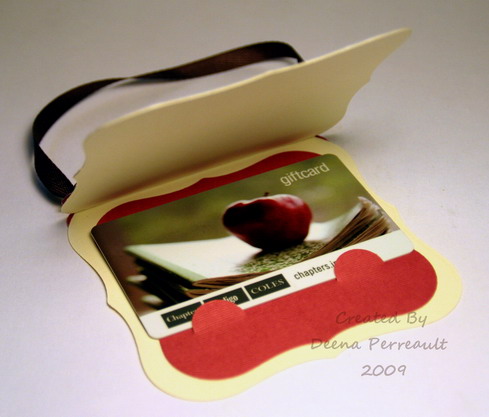
Here it is for all of you who asked…thanks so much for all the lovely comments I received on these gift card holders!! You are the best!!!
Materials:
- Card stock (sturdy for base) 8.5″ x 4.5″
- Card stock (inside holder) 4.25″ X 4.25″
- Decorative paper 4.5″ x 4.5″
- Labels One Die cut Nestabilities Largest, and second largest (Or similar die cuts)
- Classic Scallop Circles Nestabilities die or any 3.5″ diameter scallop circle
- Slot punch
- ribbon
- two eyelets
- one adhesive foam dot
- bead or button, or a jewelry finding
DIRECTIONS:
1. Fold base Card stock in half and use the largest Labels One nestabilities die or similar shape to cut out the purse body. Make sure to place the die cutting edge just above the fold so not to cut this part. Only the sides and botttom should be shaped and the top fold is untouched after cutting.
2. Cut out another Labels One shape in the same size as the base from the single sheet of decorative paper. Adhere to purse front.
3.Cut out another Labels one shape in one size smaller than the purse base from the card stock. Punch the slots using slot punch 1″ up from bottom , approximately 1/4″ in from the sides. Add a double sided adhesive foam dot centered 1″ down from the top . Leave the protective paper on the dot until ready to place gift card.
4. Cut circle, fold in half without creasing. Attach eyelets just below the fold at the outer corners. Add the ribbon handle by feeding through the eyelets and knotting.
5. Adhere the back half of circle to the back of base. Adhere the front center only of the circle to front of base. Add a bead or button or jewelry finding for the front closure.


I didn’t make a picture tutorial this time, since the steps are pretty self explanatory.
If you do have any questions, ask away, I’m happy to help if I can!

Fabulous! I’m so glad you tried them and liked them! Do you have a link/pic, I’d love to see yours!
Smiles,Deena
LikeLike
I just used your directions and made a couple of these. They’re ADORABLE! Just LOVE them! Thanks.
LikeLike
Super cute idea!
LikeLike
What a lovely idea! Thanks for sharing!
Regina
LikeLike
Oh, this is wonderful….
LikeLike
Thank you, Deena, it looks wonderful!
Hugs, Alina
LikeLike
How cute is this! Love that it’s a gift card holder…I am always searching for new and creative ideas and this is perfect! TFS!
LikeLike
Thanks Deena, these are awesome!!
LikeLike
This is so cute and very creative! Wonderful job.
LikeLike