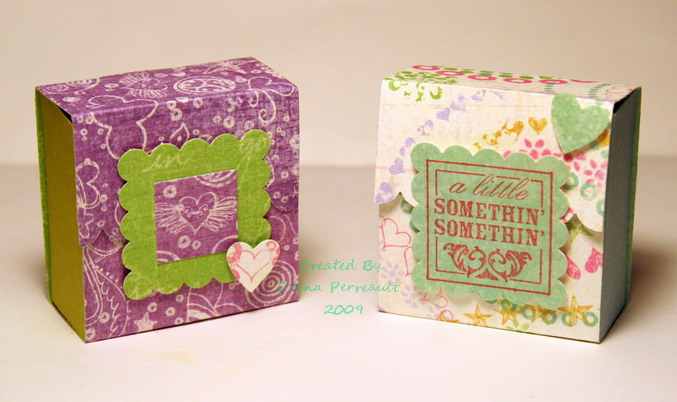
These sweet boxes were inspired by the tiny chocolate boxes featured on SCS. I love these little 2″square by 1″ deep boxes. They are just so perfect for a small treat! With Valentine’s just around the corner, they will come in handy for those sweet surprises.
Beate included a tutorial for these boxes on SCS, and it is great! But I have to admit something. I am always looking for alternate ways to do things. I am a hands on “tinkerer”. Usually I will only glance through a tutorial, mostly at the pictures, then start playing with my papers, measuring and scoring until I have something that works for me. Usually a simplified version of the original. I rarely actually follow the directions. (hey, it works for me!) It’s a lot like a cook who never follows a recipe, but instead adds or leaves out ingredients at their discretion. (which I also do) So, with that said; I modified how I made these boxes, even though the end result looks the same. And for those of you who do like to follow the directions or use the pictures as a guide…I’ve included both.
List of materials:
2″ by 7″ strip of card stock
2″ by 7 1/2 ” strip of dp
red tacky tape
scoring tool
edge punch or decorative edge scissors (I used scallop edge punch)
dimensional adhesive dots (foam tape)
STEP 1
 Score card stock strip at 1″, 2″, 4″ and 5″
Step 2
 Score heavy weight decorative paper at 2″, 3″, 5″, 6″
STEP 3
 Fold card stock at score marks to form a square, and using tacky tape adhere closed. (short end on the inside)
STEP 4
 Fold and unfold all the scored lines of your decorative paper, so they will fold properly later. Starting with the 2″ end of the decorative paper align it to the front of the formed box, and adhere, with the tacky tape.
STEP 5
 Wrap the dp around the formed box and adhere to the back. Now you have a 1″ fold, and a 1 1/2″ flap at the top of the box.
STEP 6
 Use your edge punch/scissors to give the top flap a decorative edge.
 For the closure, I punched a scallop square, and placed 3 adhesive pop dots on the front of the box right below the base of the closed flap. I used these to stick the scallop square down. (the adhesive dots should be at the bottom of the square)
The top flap slips in behind the closure to stay shut.
That’s it! EASY isn’t it? Decorate it the way you want to for any occasion. So, what do you think? Will you be making a half dozen of these? Trust me, they’re addictive!
Be sure to have a look at Beate’s tutorial on SCS too. As they say, there is more than one way to skin a rabbit. This just happens to be my way. Hope you liked it!
Have a creative day!!
So glad you stopped by! I appreciate all your questions and comments.

Very nice Deena,
I have made little boxes before because I love them, but this ones is easier, and your tutorial is great! I must lean from you…. 🙂
Lots of love my dearest friend.
Glo.xx
LikeLike
Reblogged this on A Creative Need and commented:
I am re-posting this tutorial as I think it’s a great idea for VALENTINE’s Day treats! What is it about tiny gift boxes?!! I just can’t get enough of them, and ways to make them, can you? Let me know if you missed this post the first time it came out back in 2009 and if you found it useful/relevant for you now. Thanks and have a creative day!!
Deena
LikeLike
OMG Deena!!! you shouldn’t of shown me these!!! they’re gorjuss!!!! omg!! im off to try it out!!! xxxx
LikeLike
Pingback: Scraponomy Blog » Blog Archive » Übersicht Scor-Pal Anleitungen
This box is so simple yet so cute! I often edit instructions as well (usually in the margins). You tutorial is very clear and concise. Thanks for sharing
LikeLike
I am so going to make these boxes!! they are a perfect size for a Valentine treat!
LikeLike
You’re welcome Gail, I’m glad it was useful! hugs, Deena
LikeLike
ty so much for this tut. i have made one already and it was just the right size for a little gift..i love it..loves ya Gail
LikeLike
Deena, what a cute box! Will have to try and make one.
LikeLike
These are gorgeous boxes! As soon as I have figured out those measurements in centimeters I’m going to try it out! I have a wonderful project to put inside. Oh, I do hope I find some spare time one of these days.
Thanks for the wonderful tutorial!
Els
x
LikeLike